Someone's gone mad. It may be me, but I dunno...

Monday, February 28, 2011
And down the rabbit hole I go again
Just now I followed a link to a newly marketed bench strop. It's a block of wood with a couple of socket head screws to take bits of MDF with leather on. Or not. Depending. Some number of dollars are asked for it. I genuinely thought it was an elaborate joke. I looked at the other products and there's a surface plate "cover kit" (soft fleece, no less - cosy) and a piece of ply with, um, a hole at one corner to facilitate shaping things. Apparently it's not a joke.
Beginner's Tool Kit
I've read a few articles on making tool cabinets over the years, and believe me, I'm reading a few at the moment... But they all tend to have one laughable idea in common - you should decide what tools you need to put in it. Hah! Are they mad? I could be here for years. But it happens to coincide with my re-re-re-reading of Woodworker annuals, and an article that crops up a couple of times over the years. Viz: a starting tool kit for a beginner. It's a question that crops up on the fora pretty regularly too; indeed it just did again while I was prepping this blog post. I imagine Charles Hayward got asked the question more than most and it struck me it'd be a place to, um, well... start. Then I thought "Y'know, I reckon I have all these. Be kinda fun to see what it actually looks like."


Yes, I got sorta side-tracked again... The most surprising thing is I didn't actually have all the specified tools after all.
The Essential Tool Kit, 1939, as chosen by Charles Hayward:

Small, isn't it? Want a list? Or course you do. Hayward first, then what I had available to fill the slot in brackets.
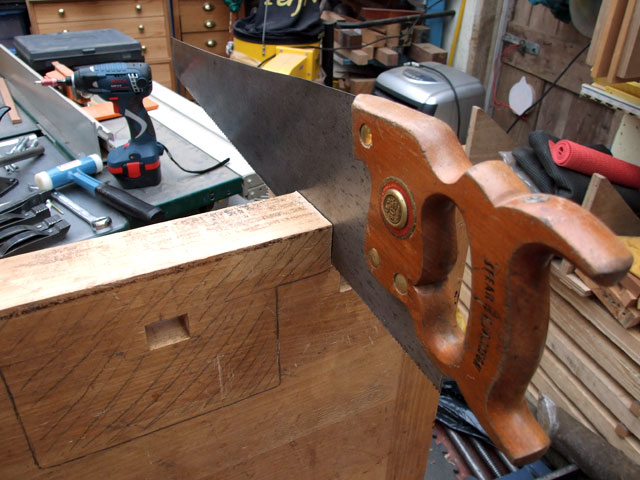
Handsaw, x-cut, 22", 8-9 ppi. (Spearior 88 22", 10ppi - all my panel saws are 10ppi, oddly enough)
Back saw, 10", 14-16ppi. (Could have used an Onions "Governor" brand 10", 13ppi but...)
or
Tenon saw, 14", 14 ppi & Dovetail saw, 8", 20ppi (Douglas & Sons 14", 13ppi & L-N, 9", 15ppi
)
Jack plane, wood, 2" cutter (A B Salmen, marked Late Chas Nurse, Technical jack, 2" cutter)
Smoother, metal, 2 3/8" cutter & Fore plane, metal, 18" long
or
Smoother, wood, 2 3/8" cutter & Trying, wood, 22" long
(Plane choice can be mixed and matched, and as I don't actually have a #6 (!), I went with the metal smoother, Stanley #4 1/2, and the wooden trying plane, an Atkins & Sons with 2 1/2" cutter)

Chisels, firmer, 1/4" & 3/4" (Hales Bros. and an unknown)
Screwdriver, 8" cabinet (Spear & Jackson)
Screwdriver, 3" ratchet (Yankee #15A - seems to be the variety shown in the accompanying drawing)
Hammer, Warrington No.4 (Stanley 8oz Warrington)
Mallet, 5" (Coachbuilder's mallet, may be 5" if you measure it at the right point...)
Pincers (Um, yep. J W Ward, Sheffield)
Nail punch, fine (2mm)
Gauge, cutting ("BugBeared" Nurse & Co)
Bradawl, medium (The text extolls the virtues of the birdcage awl, and I concur)

Brace, ratchet, 8 or 10" sweep (Stanley #901 10" - might as well start the beginner with a nice one...)
Bits: Twist, 3/8" (The text suggests a dowel bit, so one Marples example)
Countersink (Text says snail, so one J Howarth example)
Shell, about 3/16" (For screw holes apparently; mine is unmarked)
Centre, 3/4" (Text says "One or two" but sticking with the list, here's an Alfrid brand 3/4" improved pattern variety)
Square, try, 6" (The wooden stock variety are given the thumbs down and I only had an engineer's 6" all metal)
Oilstone, 7", India or carborundum, medium, or combination fine and coarse (Um... 8" slate, fine - I like the box, 'kay?)
Scraper, 5" (Scraper, 6", Roberts & Lee)
Rule, 2ft, folding (Text suggest 2 or 3 ft, so I went with a Rabone 1380 3ft)
The main thing I'm thinking is "Two chisels?!" at this point. What about you? But that's the bare essentials; Hayward then lists the tools that are likely to follow, some of them quite quickly.

That looks more like it. The chisel and measuring/marking departments both look much healthier.

So the "extras":
Bowsaw, 12" (Marples, 12")
Bullnose plane (Drawing shows an infill, but all I can offer is a Preston #1355. It's a hard life)
Rebate plane, metal (Marples 78)
Toothing plane, 2" cutter (Friends, I do not own one! First failure)Spokshave, wood, 2 1/4" blade (It's wood, but 2 3/4" blade. Lee Valley kit)
Plough (Text says the 040/043 sort are fine, but the larger is better, so a Record 044 it is)
Chisels, firmer, 1/8" & 1/2" (Marples and one of the Sorbys - it's hard to make out which one)
Chisel, bevelled edge, 1 1/2" (C Johnson and with a thinness of blade you wouldn't believe)
Chisel, mortise, 5/16" (I know why I got it into my head it should be a sash mortise chisel, but I'm utterly wrong. It's shown as an Oval Bolstered, which I have in 5/16". But this is 1/4". These days, with 3/4" stuff being more common than 7/8-1", a 1/4" is probably more useful anyway)
Gouge, outside ground, size to suit (I threw in a Ward & Payne 3/8", which I find rather handy myself)
Hammer, pattern maker's, fine (Basically something for fine work. This is the best I can do, but it needs a new handle)

Gauge, marking (User-made cam action - seemed appropriate as the design is given a couple of times in the Woodworker)
Gauge, mortise (Screw adjust is advised, so herewith one modern abomination from Crown)
Bits: Twist, 1/4" & 1/2" (The 1/4" is advised for boring mortises. A couple of nice strong Irwins seemed appropriate)
Centre, 1", or as required. (Don't seem to have an 1", so 15/16" instead)
Square, try, 12" (The hate against wooden stocks presumably continues, but this Robert Sorby is really all metal with a wooden infill)
Square, mitre, 10" (Um. Er. I don't have one. Failure number two)
Bevel 8" (8" by Moi)
Rasp & File (Unspecified. I went with Grobet 10" 2nd cut cabinet rasp and 8" bastard cut half round file)
Sash cramps, pair, 3ft, or as needed (They're on the floor, okay...?)
G cramps, 6".
Handscrews (Text favours handscrews over G cramps, so a pair of those)
In addition, the tyro is directed to make his own mitre block (8"), mitre box, shooting board (about 3ft) , straight edge (4ft), square (2ft blade), parallel strips (winding sticks), oilstone case, veneering hammer, and bench hook.
So now what are you thinking? (Apart from "I'm not brave enough to be a beginner woodworker in Charles Haywood's world") I'm thinking how it reminds me of the scarcity of tools in young Thomas' kit in The Joiner and Cabinet Maker, but more so. (Interestingly, just 15 short years later in the 1954 magazine, this has already changed a surprising amount.) I'm thinking how every forum discussion guides beginners away from bullnose planes too. But mainly I'm thinking there's a dovetail saw but virtually all firmer chisels.

At least there's one bevelled edge chisel, and a beauty. But even then the text says "not a necessity but no man who has once had one would like to be without it. It is a really splendid tool for paring" Well said, Charles - it is, indeed, and this woman has no plans to be without it either. But in a time where the bevelled edged chisel is king, the preponderance of firmers is a little hard to get your head around. Thought-provoking though, if not necessarily provoking the thoughts I'd intended. But it did highlight that I have that beautiful chisel, and I don't use it nearly as often as I might because it's hidden away in a drawer, and thus how important good tool storage is.
Friday, February 25, 2011
Pining away
So while I continue to put off boring some deliberate on the position of holdfast holes, my thoughts turn to another little problem I have:


See? This is why I prevaricate, shilly-shally and generally beat about the bush - to prevent precipitate purchase of pinus palustris. aka The Bench That Never Was. Or is it? Here's the options that have, so far, waddled to mind:
1. Build a bench anyway. You know, a bench I don't actually need or strictly speaking have room for, but at least now I could make any darn bench I liked with any darned vice/vise/vices/or viceaux (Lots of vices) I choose - within financial reason.
2. Build a bedstead. Which I could actually do with, and frankly you could build the thing like a bench if one fancied. What? You've not heard of the Roubo Four Poster? 5" square posts, I gather. After a couple of misunderstandings he stopped offering it with a choice of vices... But I'm not wildly enthusiastic about it, and frankly a lady is not necessarily keen on sharing details of her couch with the entire woodworking population.
3. Tool storage. Since this blog was but a babe in arms the recurring problem of tool storage has cropped up. (And absolutely no-one is to mention tambour doors in the comments box.) I could really, really do with a proper tool cabinet. I'm sick of not using tools because I can't find them/get to them/be arsed to go and look for them. Or because they're still in their boxes in the house, which is absolutely the worst thing of all. And anyway, benches are so last-few-(apparently-endless)-years.
Apart from that, I got nuttin'. What can you do with SYP anyway? I imagine it's a bit hellish in some respects; dovetailing, for instance. But presumably you can make "real" furniture out of it, if you fancy? I just don't know - it's only seemed to have swum into my ken in the form of benches. Endless permutations of benches.
Yup, I'm increasingly getting a feeling like whatever I decide I ain't going to be making a bench. But then again...
Wednesday, February 23, 2011
Hanging Deadman
Before we start, apologies to BB - I forgot about his board jack suggestion. I have used something similar before. Well clamps anyway. A clamp:

As you can tell from the vice and drill, and indeed the ply, this is a carefully and recently staged photo to demonstrate the use of a handscrew for the purpose. This is because I don't have any pics of me using it "in stock". And this is because I'm a lazy idiot and will sooner swear and curse than move myself sufficiently to apply one lousy clamp to the work. Which is why it's absolutely essential to have the easiest and laziest-person's solution to the problem - or I won't use it at all. So, BB's solution, although easy to make and fit, would be utterly useless because I'm utterly useless at using this sort of thing. I feel the shame of it, I assure you.
I have attached some photos of my own board jack, which I designed to overcome similar problems to yours. The overhang on my bench top is a little more than 6 inches beyond the lower stretcher, so I made this sliding jack with a “kicker” to support it against the stretcher.

The leg (vertical piece) needs to be forward (toward the user) from the point where the jack hangs in the track, so that the weight of the leg itself will make the whole thing want to swing backward into the lower stretcher. This just keeps it from swinging freely when no workpiece is on it.
The really nice thing about this design is that it is very easy to remove from the bench. The sliding “head” of the jack rides in a groove on the back side of the front edge of the bench.

There is a backing strip of wood (merely screwed to the underside of the top) that is cut short on one end, allowing the “head” to slip out of the groove and off the bench. You can see this in one of the photos, sort of at an awkward angle, but hopefully it shows the groove and backing strip well enough.

The jack can also be held in the tail vice if ever needed that way.

I built the bench top with this jack in mind, so I cut in the groove before everything else was in the way, but I think any sort of track to hang the jack could be retrofitted (or just screwed on) easily enough, and it would be out of sight on the back of the front edge. I once had a free-standing board jack that I used with an older bench, but got pretty fed up with having to step around its feet when edge-planing a long board. That was the inspiration for my newer sliding jack.
As the jack exists now, it has a series of notches on the vertical piece to hang the adjustable support block. I cut the notches on a tablesaw, but think it would be just as easy to do with a drill press and bandsaw or handsaw. Also, after I built it this way, I thought that just a series of holes drilled in the face of the vertical piece for inserting dowels to support the workpiece would be simpler and less intrusive.
A woodworking friend of mine saw it just after I finished building the bench, and he was skeptical of how strong it was, so I stood with all my weight (I weigh 200 lbs) on the support block and it didn't even make a sound. It surprised me too.
Thank you, Tom. It's certainly an option that appeals, as I can try it without making permanent changes to any noticeable parts of the workbench. I'm inclined to think it's suffered enough in that respect!
As to holdfast holes, I'm touched by the idea that time and projects will reveal unto me where to put them. How long have I had that Veritas holdfast, waiting for this very thing to happen? Certainly years, and it, well... hasn't. Why? Because it always seems easier to do without it than stop and bore the necessary hole. Yes, I know; I'm a fool to myself. You needn't point it out...
Tuesday, February 22, 2011
Oh my ears and whiskers
Today I have read forum posts that worry about how best to support a granite surface plate to keep it flat for flattening a hand plane, and a woeful situation where shavings and sawdust keep falling on the lower shelf off a workbench and how can this calamity be prevented?
Have I fallen down a rabbit hole and not noticed...?
Wasn't going to blog today, but felt compelled to roll my eyes a bit. Normal service resumed tomorrow :)
Monday, February 21, 2011
X marks the spot
"I'll tell you what I've heard myself," continued Captain Smollett: "that you have a map of an island, that there's crosses on the map to show where treasure is, and that the island lies—" And then he named the latitude and longitude exactly.

No treasure here, but if you were to add a couple more hold fast holes, where would you put them? I have a notion, but input welcome before I turn the thing into Swiss Cheese. The grid is to (possibly) make explanation easier. e.g. The existing holdfast hole is on the border of C4/D4.
Of course I can multi-task and am thus able to dither over that and other things all at the same time. What can I say? It's a gift. So I'm also wondering about my board jack/sliding deadman/bench slave conundrum. Sensible suggestions have appeared in the comments box, for which I thank you. But something held in the tail vice is only good for boards of about 4 ft long and more, which seems to be of dubious advantage for much of what I do. A separate standing bench slave appeals because it means I don't have to do any more evil to the bench itself, but I worry about the uneven nature of the floor and whether another "thing" to store in the mythical land of "Somewhere" won't be more trouble that it's worth.
My inclination is towards a sliding board jack, always ready to use, mounted on the bench. But I have 6" (150mm) of overhang to accommodate, and the only solution I've (so far) found to the problem is from the bods at Lie-Neilsen, as seen here on the Woodworking Magazine blog, and also here on "Tom's Workbench". But it's a butt-ugly solution, to my eye. L-N must have thought so too, because they certainly haven't added it to the benches in that style that they sell. But I keep toying with the idea and wondering if something along the same lines, but with less workbench trestle abuse and more elegance is possible. I'm open to suggestions on that too.


Treasure Island, by Robert Louis Stevenson

No treasure here, but if you were to add a couple more hold fast holes, where would you put them? I have a notion, but input welcome before I turn the thing into Swiss Cheese. The grid is to (possibly) make explanation easier. e.g. The existing holdfast hole is on the border of C4/D4.
Of course I can multi-task and am thus able to dither over that and other things all at the same time. What can I say? It's a gift. So I'm also wondering about my board jack/sliding deadman/bench slave conundrum. Sensible suggestions have appeared in the comments box, for which I thank you. But something held in the tail vice is only good for boards of about 4 ft long and more, which seems to be of dubious advantage for much of what I do. A separate standing bench slave appeals because it means I don't have to do any more evil to the bench itself, but I worry about the uneven nature of the floor and whether another "thing" to store in the mythical land of "Somewhere" won't be more trouble that it's worth.
Mind you, perhaps I'm over-complicating this and just a row of holdfast holes along the front edge of the bench top would be just as useful for my purposes? Or would a surface clamp be better than a hold fast in that situation anyway? Aaargh, so many options a person doesn't know what to do!
So I did something else entirely. I took the Stanley 1221K hand drill that I cleaned up when I was doing the M-F #2 the other day, and I... Well, let's just say it's gone from this: (top right corner

To this:

And then to this:


I feel a little bit unclean; I don't repaint tools. But it has a hole in the handle, a missing tooth in the gear wheel, the gear wheel itself looks like it was cast by a blind man, and the chuck is seized up so I can't fix the sticking jaws - I figured anything I did was only going to improve it. But mainly I figured the gear wheel would be rusting endlessly if I didn't paint it. The only thing against doing it was the fact no-one seems to know much about a 1221K; it's a Stanley "Defiance" model, but unlike the K-less 1221, it has a side handle. What is it with me and unusual egg beaters anyway...?
Friday, February 18, 2011
The Woodworker
Thought I'd give the workbench stuff a break, for your sanity as much as mine. Although what to do with a big stack of 2" southern yellow pine is playing on my mind more than somewhat, so I've been flicking through the old Woodworker annuals again, idly wondering if it might be fun to drag bench making into the 20thC and make the "Hayward Bench" just for the hell of it. Must be something in the air, judging by The Schwarz's latest post on the Lost Art Press blog.

I recalled that Bob Wearing had remembered Charles Hayward before, for the obituary in The Woodworker itself. So I dug it out and scanned it for the edification of the masses. Or any masses that might be interested.

Funnily enough I was also on the lookout for Robert Wearing's work as I got into the editions from the 50s and articles started to be attributed to their authors. Unless I missed it, the first one positively identified is on dovetails in 1959. Not the cutting of them, but the finer points of making them look good. Needless to say there are a couple of tools you can make to facilitate this. Alas, I'm missing a couple of volumes in the very early 50s so I don't seem to have the one on making the plane. The way things are going, if I don't get them soon I won't be able to afford them...
I wanna tell you a story 5 - resources
These are just the sources of information/supply that I used; there are others, but it's amazing what you find after you've started...
The Iron Hand for general information, especially Emmert Vise Anatomy.
Previous Emmert fitting experiences:
Russ Allen
The Workbench Book
Original instructions:
Union Hill Antique Tools are the clearest.
Assorted hints and tips:
Okay, so like many others, I have some issues with how the Sawmill Creek forum goes about its business, but it seems to be a bit of a hotbed of Emmert tips and information. Well worth a search. And the Old Tools List, of course.
Screws:
There seems to be a lot of variation in what size and how many screws are needed. There are a total of seven screw holes in my hinged mounting plate, and I found I didn't seem to have quite enough room to take a full 2" in the hole over the hub. In my case I used 14g Silicon Bronze wood screws from Seaware. They were very helpful, didn't turn a hair at the assortment of lengths and small quantities I needed, and were happy to take anything back if it didn't fit. I took the tilt adjustment bracket with me, as it had the same size holes, which helped a lot.
Magnetic sheet:
e-Magnets Again, top notch service and the first place I've bought from that outdoes Lee Valley in a love of, or should I say attraction to all things magnetic.
Cork sheet:
Gaugemaster No complaints, except the embarrassment if my brother finds out I've been buying anything to do with model railways...
Think that's the lot, but subject to editing and any comments of a "where did you...?" nature :)
Thursday, February 17, 2011
I wanna tell you a story 4
With the vice all apparently working, the unskilled labour was drafted in to help me flip the thing over so I could flatten the top. After all the bumps and dings the top got during this whole process, I'm glad I decided to leave the refinishing 'til the end. The Emmert's hinge mounting plate was deliberately set slightly below the bench surface to facilitate that, and it worked fine.
The Millers Falls jack and Veritas bevel-up jointer did the necessary, with the 3x2 now drafted in to act as a lateral stop. Unfortunately I had no means of stopping it walking lengthways across the workshop as I planed, so I was pretty much pulling it back into position after every stroke. All jolly good fun and reminder, if reminder was needed, why a workbench that doesn't move is so essential for successful planing.
Couple of coats of finishing oil later, and it's like having a brand new bench. Cool.

The unskilled labour was called upon again and the top was lifted back in place. Oh happy day! Vice (or vise) reassembled and proving what I'd suspected all along - it would have looked bloody ridiculous on a 5ft long bench.

And the obligatory Emmert rotate 'n' tilt shot.

But I wasn't finished there, reader; there was the tool tray to fill in. Some laminate flooring filled that need admirably - I told you it was going to be shallow.
 While I was at it, it seemed a shame not to make a better job of the shelf below as well. I even went so far as to swap round my available plastic boxes so I had a matched set of three at last.
Then I lined the jaws; starting out with leather in mind, but the price almost makes wood look like it grows on trees, so I ditched that idea and went for cork instead. This stuff is sold to the model railway layout fraternity and is 1/8" thick.

Now you're probably gathering up the breath to say "But Alf, is it wise to glue it to the cast 'arn? What about if you ever get the tilting jaw insert thingy? How will you fit it?" Step forward Dave Anderson, who's pearl of wisdom I culled from Sawmill Creek during my reading of all things Emmert - self-adhesive flexible magnetic sheet. Make the liner in two halves and you can pop it off and on as occasion demands. Brilliant.

As I had the cork out, I lined the jaws of the tail vice too; something I've been meaning to do for ages.

Behold; all looking worryingly smart.

You see how it looks like the floor's sloping fairly drastically from left to right in that photo? That's because the floor slopes fairly drastically from left to right. This may be why I can't decide what height of bench I like; it depends on which end of it I'm standing at... I do know that for a while it felt amazingly tall having go used to it down at saw horse level.
Anyway, it looking all fancy like that was a bit unnerving, but luckily, by the time I'd loaded up the shelf with the bench-on-bench, the bench hooks, the shooting boards, etc, it was much more normal. I dallied with making some new bench dogs, but decided a bit of familiarity would be nice to retain.

I may yet have to move things about a little, in case there's not enough room for the vice's beam to swing when it tilts, but that's not a problem.
But we're still not done really, although you're now as up to date with things as I am. I really would like to make some improvements to holding work on the front of the bench, and I think another holdfast hole or two might be a Good Thing.
Oh, and I've got to put all the tools back. Which reminds me, tools used...

What? If you think I'm listing that lot, you must reckon I'm crazy. Crazier than chopping a big hole in my bench, that is...
Wednesday, February 16, 2011
I wanna tell you a story 3
An Emmert vice that doesn't rotate is an abomination. Really, if you think about it, it's virtually any old face vice but with big dreams. That won't do, so allowing it to rotate was essential. (I dunno, should I really call it a "vise", it being 'Murrican an' all? But I digress...)I have to say my inability to think in 15 dimensions really didn't help at this stage. It took me ages of paring and testing. At this point I really learnt to hate the end cap - the end grain complicated things just that little bit more.


As you could see from that photo, another dog hole was rapidly ceasing to exist. Really I should have blocked it off before I started, but I got away with it. Only downside is the beech I had available to use for the job is much whiter than the bench, so although the fit is good, it doesn't exactly blend in. Heigh ho. Also evidence of when tiredness overcomes good practice; nasty breakout on the bottom edge from cross grain work after a failure to appreciate that the initial chamfer had been obliterated by the amount of wood I'd had to remove. Annoying, but not fatal.

Planing up the beech to plug the dog hole was interesting. The only accessible means of holding it was the front edge of the tail vice, but that was with the bench still resting on its edge and therefore hardly a secure platform. I resorted to Eastern practices and used my small Mujingfang plane on the pull stroke, so I could keep the workbench upright at the same time. I'm not going to dump all my Western pushing planes as a result, but in this kind of situation, it proved to be a bit of a life saver.
Meanwhile a third dog hole was looking decidedly ropey. I'm reluctant to lose it completely - after all, you never know when you might need it - so I chiseled off the wafer thin section to at least leave a stronger edge. Don't anticipate it being a problem, but I'll see how it goes and can always fill it in later if necessary.

And the completed curvy cut out. No, it doesn't necessarily rotate completely at any tilt angle, but I'll wait and see if that's a problem. If it is, I will joyously embrace further hours of paring and fitting. And if you believe that, I have a bridge to sell you...

Houston, we have rotation. I first 360° spin was, I admit, a bit of a buzz. I did it a couple of times, just for the hell of it. I may have gone "Wheeeee" as I did so, but I ain't telling.

Around this point, my view of the Emmert switched from "millstone around my neck (or ankles)" to "Ooo, I could like this". This is a Good Thing. Thus, with renewed appetite for the battle, I approached the matter of the space for the beam.
More sawing, chiselling - with yet another (shorter) chisel, 'cos now I was working with a restricted space - and I had a perfectly fitting hole. Which was stupid, because obviously I needed to make it wide enough to allow the beam to rotate too. So a bit more sawing and chiselling later...

Yes, the tilt adjust mechanism has put in an appearance too. The Emmert instructions advise benches under 3" thick should have a padding piece added under the bracket, which I duly did. Quite a lot of padding in the end, to bridge the pocket in the bench top where the nut for the bolt holding on that pesky end cap resides, and to stop the tilt bar hitting the front edge of the tool tray as it moved downwards. Besides, it seemed to me that, within reason, the more accessible the lever was, the better.

All looking very purposeful at this point. Great.
So then I took it all apart again in order to flip the top back over.
Well removed the jaws anyway. Sigh. But by this stage the finishing line definitely felt in sight.
Tuesday, February 15, 2011
I wanna tell you a story 2
In the first instalment I left you hanging from a router-infested cliff; would our heroine survive another encounter with the Power Tool of Her Nightmares? Read on...
You may imagine how I agonised over the whole thing, my record being what it is. But I made a template and used the guide bush and it was... okay. In fact it was fine. I managed to be a muppet and lightly graze an area of bench top I didn't want to, but nothing serious.

And there it is. Not bad, eh? I could almost - almost - learn to like the router if it always behaved like that.

Next step was to fit the hinged mounting plate to its recess. A matter complicated by the fact that it's been repaired with a weld at some point, so all sorts of relief in odd places was required. I procured a candle and sooted up the plate so I could see where I needed to remove wood and where I didn't. Viz. It's not pretty, is it? A very real work in progress shot, that.

After considerable testing, fitting, paring, tweaking and general madness-inducing work, it fitted. Woot!


So I had to try it with the jaw in place too, didn't I? A word of huge love and affection for the Veritas hold down; it made the job 2000% easier. It just sat there in its hole and held that hinged mounting plate in its recess like a champ. Without it I would have gone even more insane than I did anyway; with it I could hold the thing in place while I endlessly fiddled about.

Even to the point of putting the front jaw in place. Which reminds me; another tip I found somewhere was to install a screw so the hub rests on the head - that way to can make sure your rear jaw is at 90° to the bench top. Very handy.

With the beam in situ, I was able to mark off where I needed to remove yet more precious bench in order to be able to close the vice at all.

At this point I almost had a functional face vice, but of course it wouldn't rotate for toffee.
Monday, February 14, 2011
I wanna tell you a story...
Ah, starting a blog entry with Max Bygraves; never a good sign.


Step two was to cut the notch to take the bulk of the hinged mounting plate. Bye-bye to our first dog hole, and yet more of my precious bench. *sob*


Now strictly speaking I'm not done, but I promised more detail and the theory is that if I do this in instalments, by the time I get to the end, I will actually have, um, got to the end. That's the theory.
So, last March, I think it was, I got an email telling me "You're about to get a weird email". Arguably I'd just received one, but no, I was to expect another one. Thus, in April, I received - well, not so much a weird email as an unexpected email, asking me if it would be okay to ship the Emmert vice this week. Well after I'd picked myself up off the floor and processed the whole concept of orphaned vices turning up on the doorstep, I agreed it was. Quelling the urge to move house before it could get here, the saga began. Hit the "emmert" tag at the bottom of the post, and you can refresh your memory. But take note, gentle reader - it's been under a year. I'm speeding up in my old age...
Well having finally decided that it was going to go on my existing bench after all, first step was to mark out where it was going to go. I nicked a cunning tip from James Watriss' blog of clamping a board in the existing face vice, then clamping the Emmert on the board to get it lined up. (He's subsequently appeared in the comments box, so hello and thank you, James!) The result:

The next step was to remove the existing face vice; which is large and heavy. This is a running theme with this whole task. So are bruises. My bruises have bruises from moving, lifting, inadvertently walking into, and generally encountering heavy lumps of cast iron and beech. You don't tend to notice at the time - except knocking your shin on an Emmert vice jaw, which you really do. A lot. I've never physically hopped across the workshop swearing a blue streak before, but I bet it would have been amusing for an observer.
Where was I? Oh yeah. Then I drafted in the unskilled labour to help me lift the bench top off its trestle base and onto the saw horses. I've mentioned the saw horses before, haven't I? And how brilliant they are. Well next time I'm making three. Two for the work and one for me to sit down on in a state of exhaustion... Once the bench top was on edge, I propped it up with a length of 3x2 against the Maxi 26 so at least it wouldn't fall over one way. This was just as well, as it turned out, because the one time it did fall over - loudly and terrifyingly - it fell away from me. Which as I was crouching down at the time was just as well, or I'd have had one hell of a headache. At best. You can't blame the bench top for trying to get away though, when I did this to it.
Keep an eye on the background in these pics, and see how the number of tools used steadily mounts up. Or in this case, the foreground, where the oak mallet I made years ago still refuses to die as I wield it mercilessly on an assortment of chisels, trying to find the best one for the job. Turns out, despite my little chisel problem, I don't have a long, wide, beat-to-death chisel amongst them. But I managed.

The idea was to make as close a fit to the rear jaw as possible to start with, and then go from there. Speed of progress wasn't helped by the nature of the beech being such that it naturally wanted to run out to the top side when I spit it off. Such is life - and wood.

Spokeshaves were out of their depth with this job, or I was. Maybe both of us. But a combination of a Stanley #78 (Type 1 - no depth stop or fence) and wooden rounds worked across grain worked splendidly.

Step two was to cut the notch to take the bulk of the hinged mounting plate. Bye-bye to our first dog hole, and yet more of my precious bench. *sob*

Same saw and chisel procedure as before. If you've been reading this blog since I made the chair, you might recall how my thumb joints strongly protested about the mallet work? They still do, it seems. Sigh.

By this point I was thinking that a little electrickery was required, if I wasn't to still be doing this by next Christmas. Plus the lack of a useable workbench was really getting me down. To those who believe you have to build your workbench to be properly attached to it, I say 'tis not so. I was like a woman missing a limb the whole eight days while the bench was out of action. Horrible, 'twas.
Indeed such was my mentally weakened state, I...
Reader, I got out the router.
But I'll tell you how that went in the next entry ;)
Subscribe to:
Posts (Atom)